This is my general blog site for “stuff” I do.

Month: February 2023

VMAXSCART – Dry Fit

Dry Fit of Blower

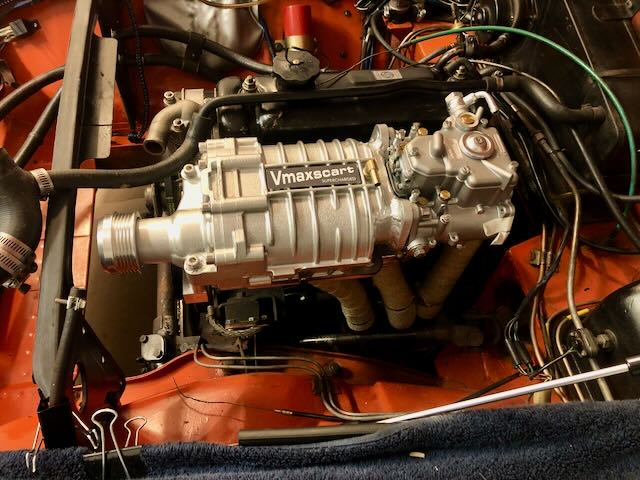
Today I did a test fit of the blower to the engine and I found a couple of challenges.

The first was the crankcase breather tube came up under the blower idler pulley bracket. That needed to be shortened so that I could fit a hose that will route to the carb intake. The hacksaw did a fine job of shortening it.

VMAXSCART tight fit with Tourist Trophy header

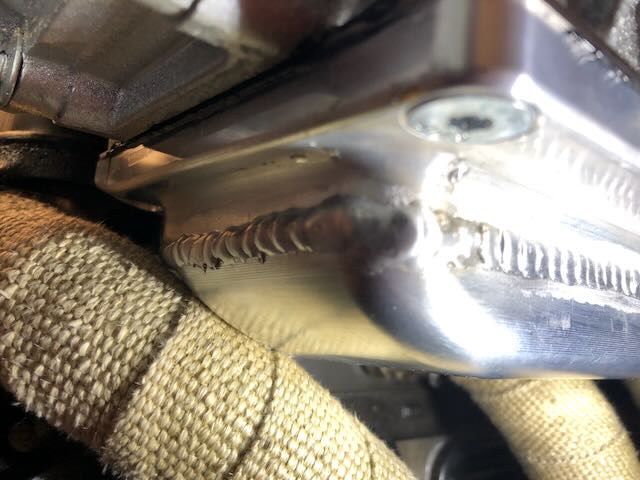
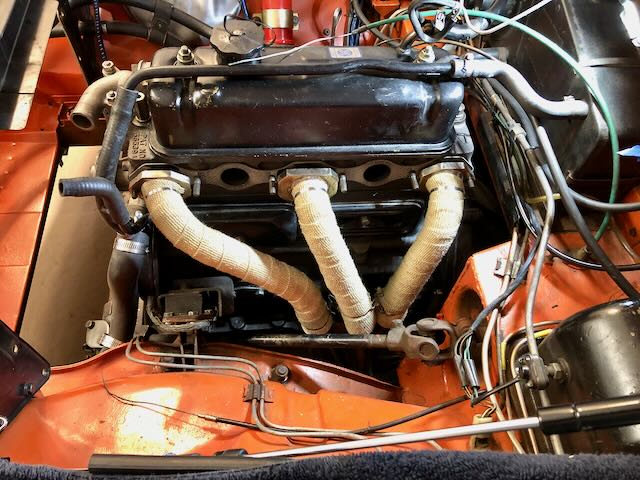
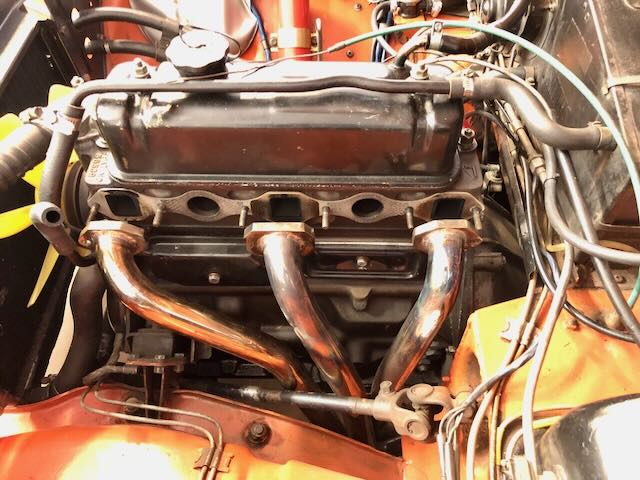
I tightened down the header and the SC and noticed that the manifold is compressing the heat tape at the number 1 cylinder. I’m wondering if this will be an issue. I believe the header and SC are torqued down and sealed to the head. The other header pipes have clearance without contact. I’ve emailed Stuart and asked that question. Some solutions could include ‘reshaping’ the header pipe to reduce contact.

One good thing I found was that the manifold studs are long enough to preset the washers and nuts in place before setting the blower onto the studs. Stuart designed the ears so that you drop the unit into place from the top with the washers in place. Thanks Stuart!

VMAXSCART – Header Wrap

This was a great, short, project for today. I used a 15 foot roll of 3 inch heat tape for the three pipe header. I divided it into three 5 foot lengths which easily covered the pipes down to just above the collector. Its main purpose is to reduce the heat just below the super charger. The unit is supplied with a cooling section built into the bottom of the manifold. That can be chilled with a radiator and pump which is available, as an option, from VMAXSCART.

Next, I’m going to ‘dry fit’ the super charger, to see how the fuel line, crankcase breather and water hoses will work.

Tourist Trophy header wrapped.

VMAXSCART – Pulley Install

Yup. I’m going slow on this project. I wanted to finish other ‘clean-up’ items before I competed the install. I think those are done… as if they are ever ‘done’.

Pulling the old pulley

First on the list is to install the new combination pulley for the super charger. That includes unbolting the engine mounts (a P.I.T.A.) and lifting the engine. The photo shows how far the engine mounts are separated. Next I backed off the 1 5/16″ bolt on the old pulley. I set the engine at TDC before pulling the old pulley.

New Pulley compared to the original. Old timing mark is visible.

The new pulley came without a timing mark. The 74 MGB has the timing mark visible from the top. I lined up the key way on both and created a mark on the new pulley.

New Pulley mounted

Pulley is in place. Once again, you can see the motor mounts.

Engine Remounted. Yes, oops, the gound strap needs to be connected.

This is after dropping, and bolting, the engine back into place. There is adequate clearance for the super charger belt to be added after installation. The water pump belt will ride behind the SC belt. Next, the alternator needs to be re-bolted. Then I’m going to heat wrap the Tourist Trophy header pipes.

VMAXSCART – It has begun

Off with the old.

The package arrived on Wednesday and I waited until Thursday to start the first steps of the install. I reread everything I could find on line about the install and read the Mini install documentation and I have a general ideal of what items I need for the install. Those , that I know of, included the front crank seal and timing chain cover gasket. I’m not sure I need the timing chain gasket, but I rather have it on had if I need it. At the moment that appears to be the main parts I’ll need, but that never seems to be true in a project like this. The kit is very complete.

During the removal of the carb and manifold I found that I was leaking oil from the left-side fuel pump blanking cover. Also, the upper engine cooling connect was leaking antifreeze. That added two more gaskets to the mix. I’m sure I’ve missed other ‘needs’ as well. (Oh, I do have a good supply of dark beer in the fridge).

An important step was to set the engine to top dead center on cylinder one. There are no timing marks on the new pulley. Still thinking of a good way to mark that. The keyway is the common locator and I’ll have the old pulley to use as a guide. I’m sure I’ll move the timing mark as I unbolt the old pulley.

So, for now, I’m waiting for parts from Moss. I need to install the new fuel pump cover gasket before I bolt up the headers. Next on my list is draining the antifreeze, removing the radiator and cooling hoses.

VMAXSCART – Arrived

The SuperChargers arrived last night. They were packed well and arrived without damage. The only catch was caused by me… I didn’t have an UPS account and didn’t get updates or requests. Once I got onto the site I noted that the packages had been sent to a warehouse pending response from the importer. Well, I’ve never been an importer before… now I know some of the procedures involved with foreign purchases.

This was the first example of why I bought the kit. It’s a learning experience. I also wanted a project for winter and beyond that gave me something to fiddle with. Installing this requires flexibility by the user, not all MGBs are built alike. It will also be a new adventure having a super charger on the car. I’m hoping it will provide the ‘boost’ in driving experience I’m looking for.

Here’s a photo of the two kits I ordered. The second one will be going on a RHD MGB GT that my friend owns. I’m sure my experience of putting it in my car will be helpful on the second install. That will not occur until early this summer.

VMAXSCART shipped 1/31/23

I just got an email from Stuart that the two super chargers that I ordered will be shipped this week. It will be interesting to see how, and how long, that process is. I’m sure the shipping is still slow from Europe, but I’m hoping it’s better then it’s been in the past two years. Thanks for the update Stuart. I’m looking forward to the project.

© 2024

Theme by Anders NorenUp ↑